運用AI打造真實網路應用程式:從概念到上線的系統化方法
本文闡述了運用AI打造可上線網路應用程式的系統化方法,涵蓋從概念發想到部署的完整工作流程。文章強調流程比程式碼更重要,並推薦了特定的AI程式碼設定選項。
![]()
![]()
© 2026 MakersHub.dev. All rights reserved.
Building Real Web Apps with AI
From Idea to Production - A Systematic Approach
Learn the complete workflow for building production-ready web applications with AI. From ideation to testing to deployment, this guide shows you the process professional developers use to ship real apps.
That app idea in your head? The one with user accounts, a database, maybe payments? You've been putting it off because you don't know where to start—not just the coding, but the entire process.
The process matters more than the code. Once you understand the systematic approach, AI can help you implement each step.
The Tech Stack
Building web apps involves choosing from many technologies: programming languages (JavaScript, Python, PHP, Ruby), frameworks (Next.js, Django, Laravel, Ruby on Rails, Angular), and databases (PostgreSQL, MySQL, MongoDB). We're choosing the following stack because it's the most popular, has extensive learning resources, and is flexible enough to build almost any idea you can think of—from simple tools to complex SaaS applications.
AI Coding Setup Options
The right AI coding setup is your secret weapon. It turns hours of work into minutes—writing components, debugging errors, and navigating unfamiliar codebases becomes almost effortless. Here are our recommended setups:
Recommendation
Start with Cursor—it's the easiest to get started with. Add Claude Code later when you need deeper codebase understanding or help with complex architectural decisions.
The 5-Step Workflow
Now that you have your tools ready, here's the systematic process we'll follow. Each step builds on the previous one—skip nothing, and you'll have a production-ready app.
Refine Idea
Setup Environment
Build Foundation
Build Features
Launch & Monitor
Refine Idea
Setup Environment
Build Foundation
Build Features
Launch & Monitor
Key insight: Build one well-tested feature at a time. Deploy it. Move to the next.
Refine Your Idea
Most people skip this and jump straight into coding. Big mistake.
Define Your MVP
Open ChatGPT or Claude and have a real conversation:
After brainstorming, get specific:
Example MVP Breakdown
Build later: Advanced analytics, social features, custom reminders, mobile apps. Ship the MVP first, then add these based on user feedback.
Document Your Data Model
AI will provide something like:
Pro Tip: Extending User Profiles
Supabase Auth stores authentication data in a special auth.users table (email, password hash, OAuth tokens). You cannot modify this table directly.
If you need additional user information like usernames, bio, avatar URL, or social accounts, create a separate public.profiles table linked to auth.users via the same id. Then use a database trigger to automatically create a profile record whenever someone signs up.
This keeps auth data (managed by Supabase) separate from your custom user data (managed by you).
Save this document. You'll reference it constantly during development.
Set Up Your Environment
Prerequisites
Before building anything, you need a few essential tools. Node.js runs your development server and manages packages. Git tracks code changes and connects to GitHub for version control. Your AI coding tool (Cursor or VS Code with Claude Code) writes most of the code. The Supabase CLI lets you run a local database and manage migrations. Finally, you'll need a GitHub account to store your code and connect to deployment platforms like Vercel or Netlify.
Create Your Project
Let's scaffold a new Next.js application with all the modern defaults we need.
Next.js project setup commands
Install Dependencies
We'll install the Supabase client libraries for database and authentication. For UI components, we recommend Shadcn/ui—it gives you beautifully designed, accessible components that you own and can customize. Feel free to use another UI library if you prefer.
Supabase and Shadcn setup
Set Up Git
Version control is essential. Initialize Git and connect to a remote repository to keep your code safe and enable collaboration.
Git initialization commands
Supabase: Three Environments
We recommend setting up three separate database environments from the start. This keeps your development experiments isolated from real user data and gives you a safe place to test changes before they go live.
Local Supabase setup
Environment Variables
Environment files store sensitive configuration like API keys and database URLs. You'll have one file per environment. While we're starting with Supabase credentials, you'll add other variables here as your app grows (API keys, feature flags, etc.)—more on this later.
Create three files in your project root:
Environment file examples
How to switch between environments
Local development (default):
Testing with staging database locally:
Deploying to Vercel or Netlify:
Never commit .env files to Git. Environment variables stay local or get added directly to your hosting provider.
Understanding Migrations
Critical concept
Migrations are version-controlled SQL files that define your database schema. They ensure everyone has the same database structure.
The workflow:
Example migration file
Applying Migrations
Once you've created a migration file, you need to apply it to your databases.
Local database commands
Cloud database commands
Always test migrations on your local and staging environments before pushing to production. Database changes can be difficult to reverse.
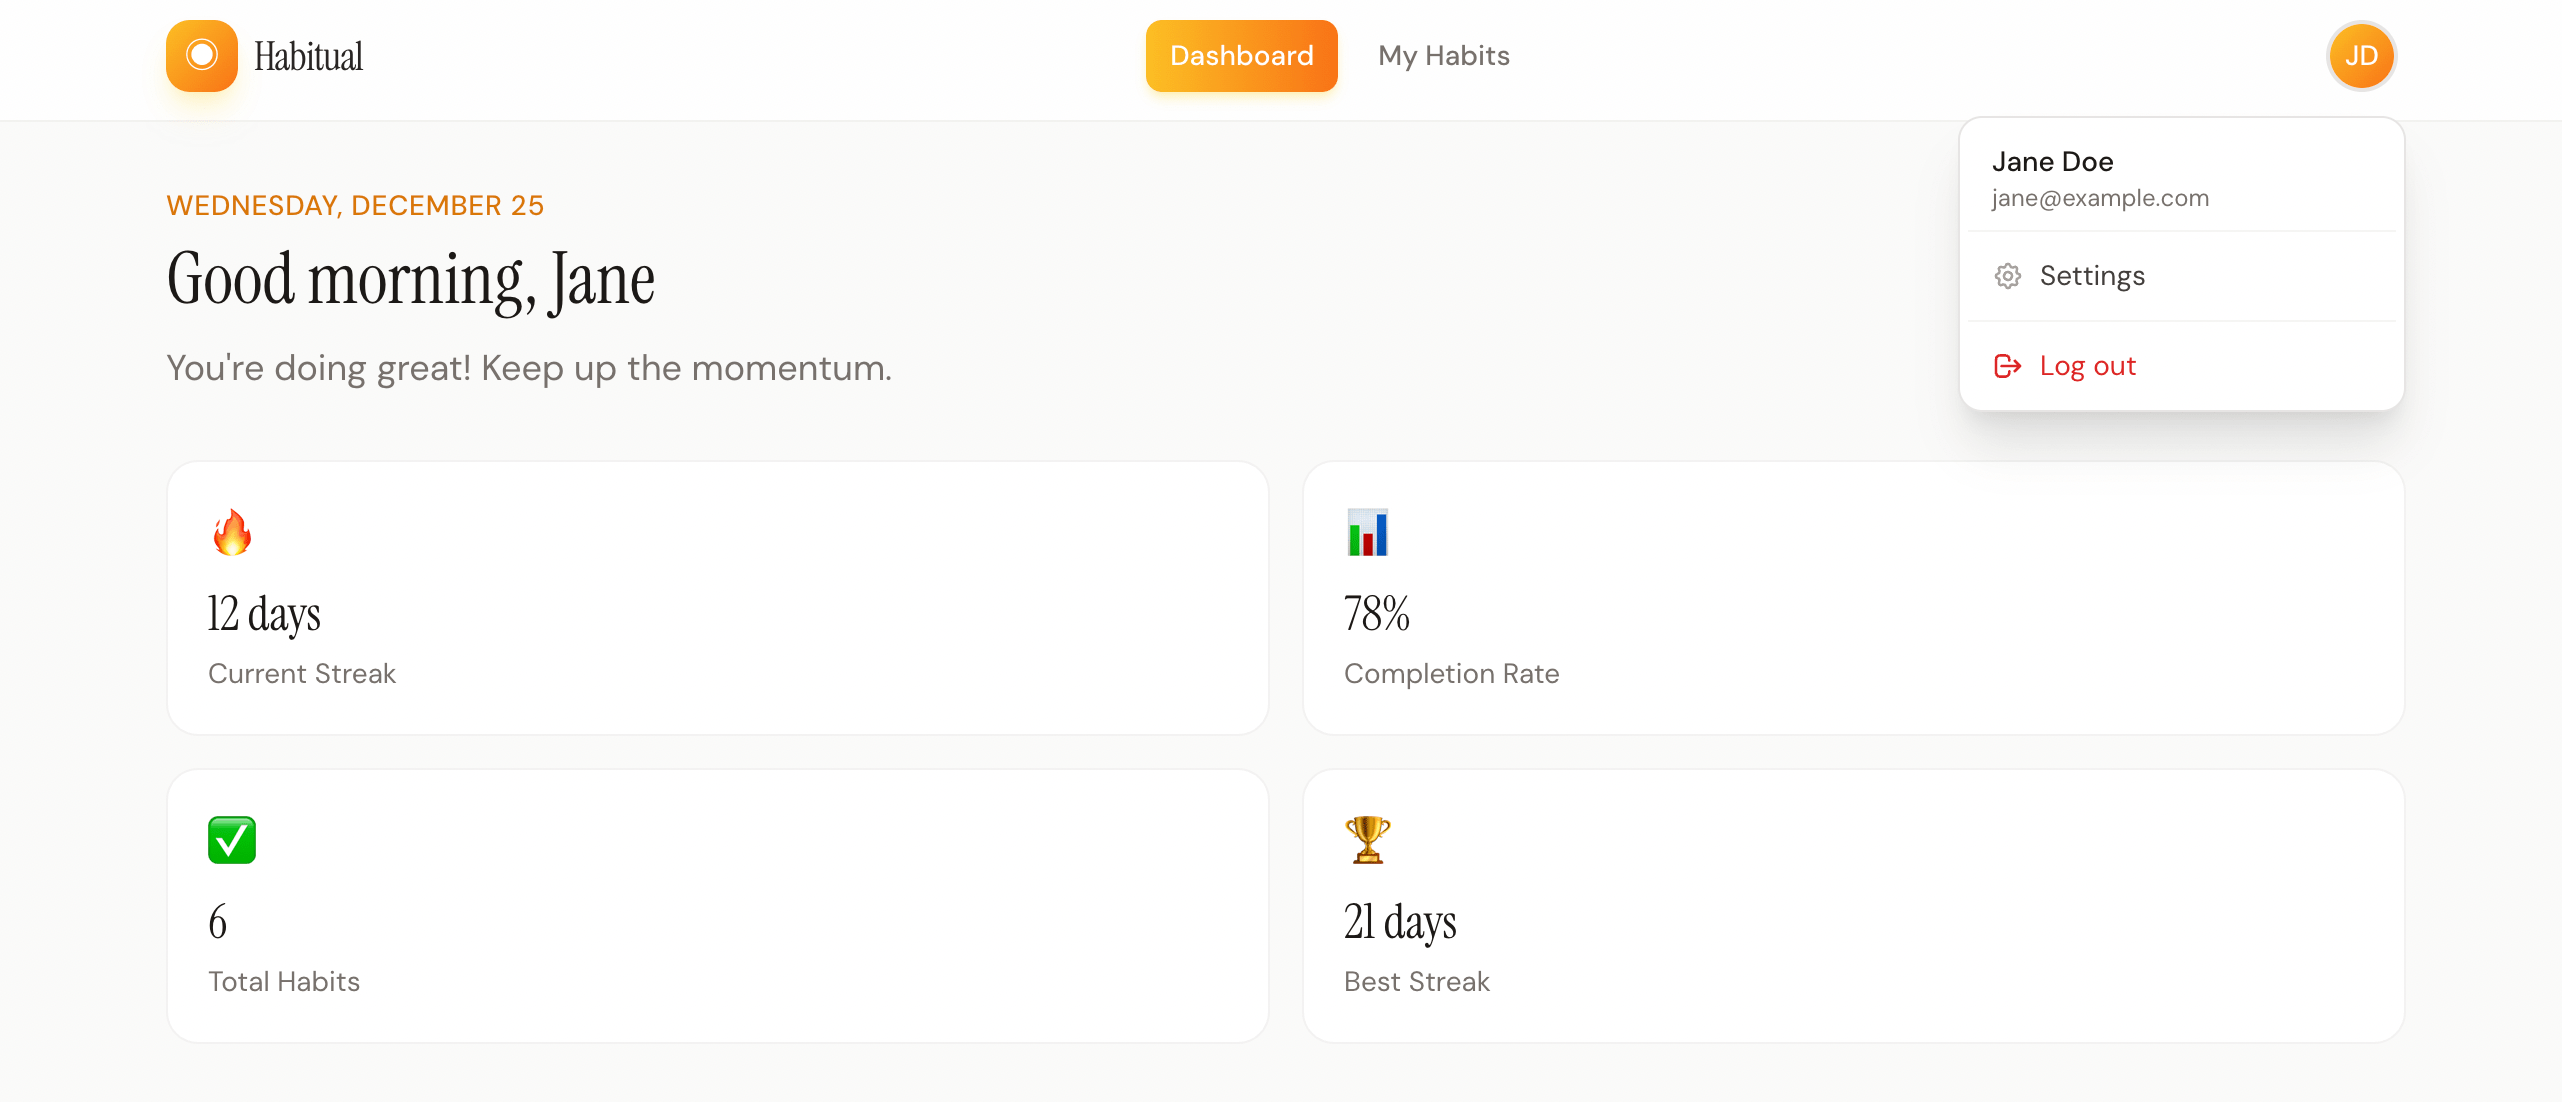
Build Foundation: Layout & Auth
Create Layout Structure
Every page in your app will share a common layout—navbar, footer, and content area. Let's create this foundation first so all future pages automatically inherit it.
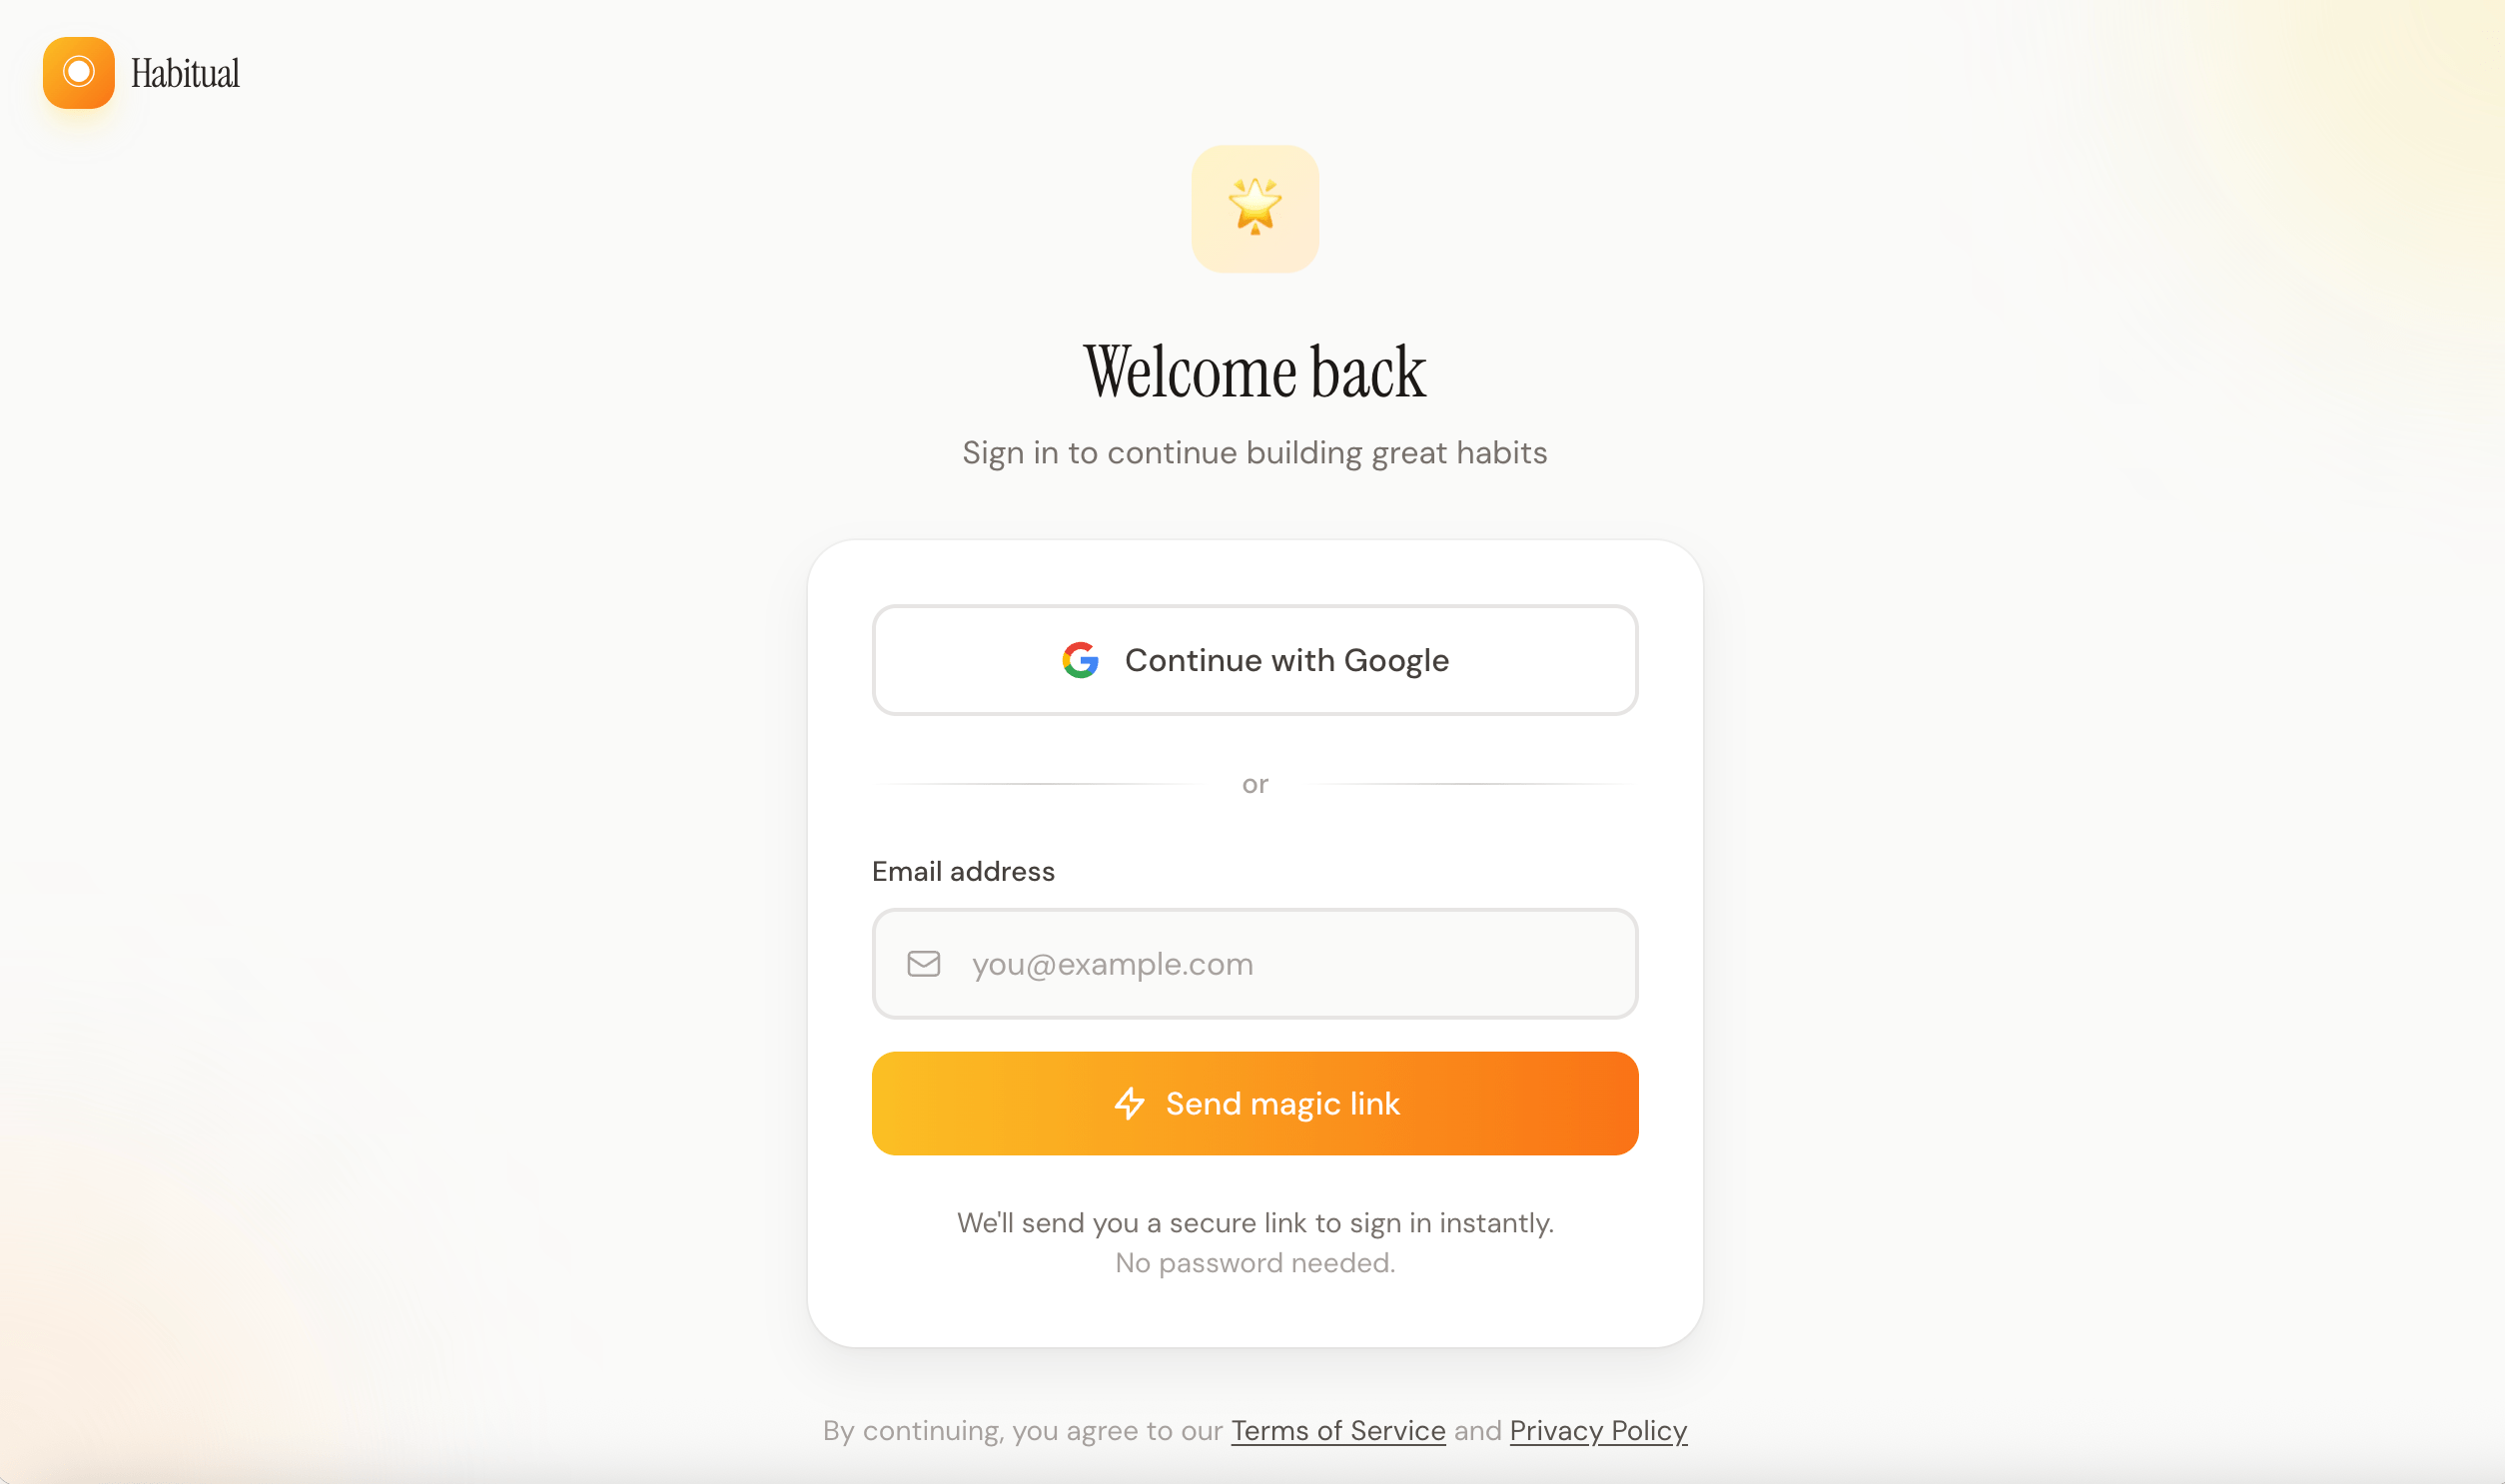
Set Up Authentication
Supabase offers many authentication methods—OAuth providers (Google, GitHub, etc.), Magic Links, email/password, and more. To keep things simple, we recommend:
If you want the simplest setup, use Google Login only. Adding Magic Links requires configuring an email service (like Resend) to send the login links. We avoid traditional email/password authentication—it opens the door to security issues like weak passwords, credential stuffing, and password reset vulnerabilities.
Configure Supabase Auth
Create Auth Pages
With Google and Magic Link, you only need a simple login page—no separate signup or password reset flows to build. Users are automatically created in Supabase on their first login.
Protect Routes with Middleware
Next.js middleware runs before every request, making it the perfect place to check authentication. If a user tries to access a protected page without being logged in, they'll be redirected to the login page.
Test Authentication
Before moving on, verify that authentication works end-to-end. This is one of those things you want to get right early—debugging auth issues later is painful.
Google OAuth doesn't work with local Supabase. To test Google Login, connect to your cloud staging instance by renaming .env.staging to .env.local temporarily. Magic Links also require a cloud instance with email configured.
Check Supabase Studio to verify users are being created—use your cloud dashboard at supabase.com/dashboard when testing with staging, or localhost:54323 for local testing.
Build Features Iteratively
Git Workflow
Before diving into features, let's establish a Git workflow that works with our two Supabase environments (staging and production).
Branch Strategy
We use two long-lived branches, each connected to its own database:
For each feature:
Git commands for feature workflow
Set Up Vercel or Netlify
Before building features, connect your repository to a hosting provider. You only need one project — it automatically handles staging vs production deployments.
How Environment Variables Work
Vercel and Netlify assign environment variables by deployment type, not branch name:
Configure Environment Variables
Add your Supabase credentials separately for Preview (staging) and Production:
In Vercel: Settings → Environment Variables → Add each variable and select which environments it applies to.
In Netlify: Site settings → Environment variables → Create variable with different values per deploy context.
Never commit environment variables to Git. Always configure them in your hosting provider's dashboard.
The result:
Same codebase, different configs, fully isolated.
The Feature Development Cycle
For every feature, follow this process:
Plan
Migration
API Routes
UI
Manual Tests
Write Tests
Deploy
Plan
Migration
API Routes
UI
Manual Tests
Write Tests
Deploy
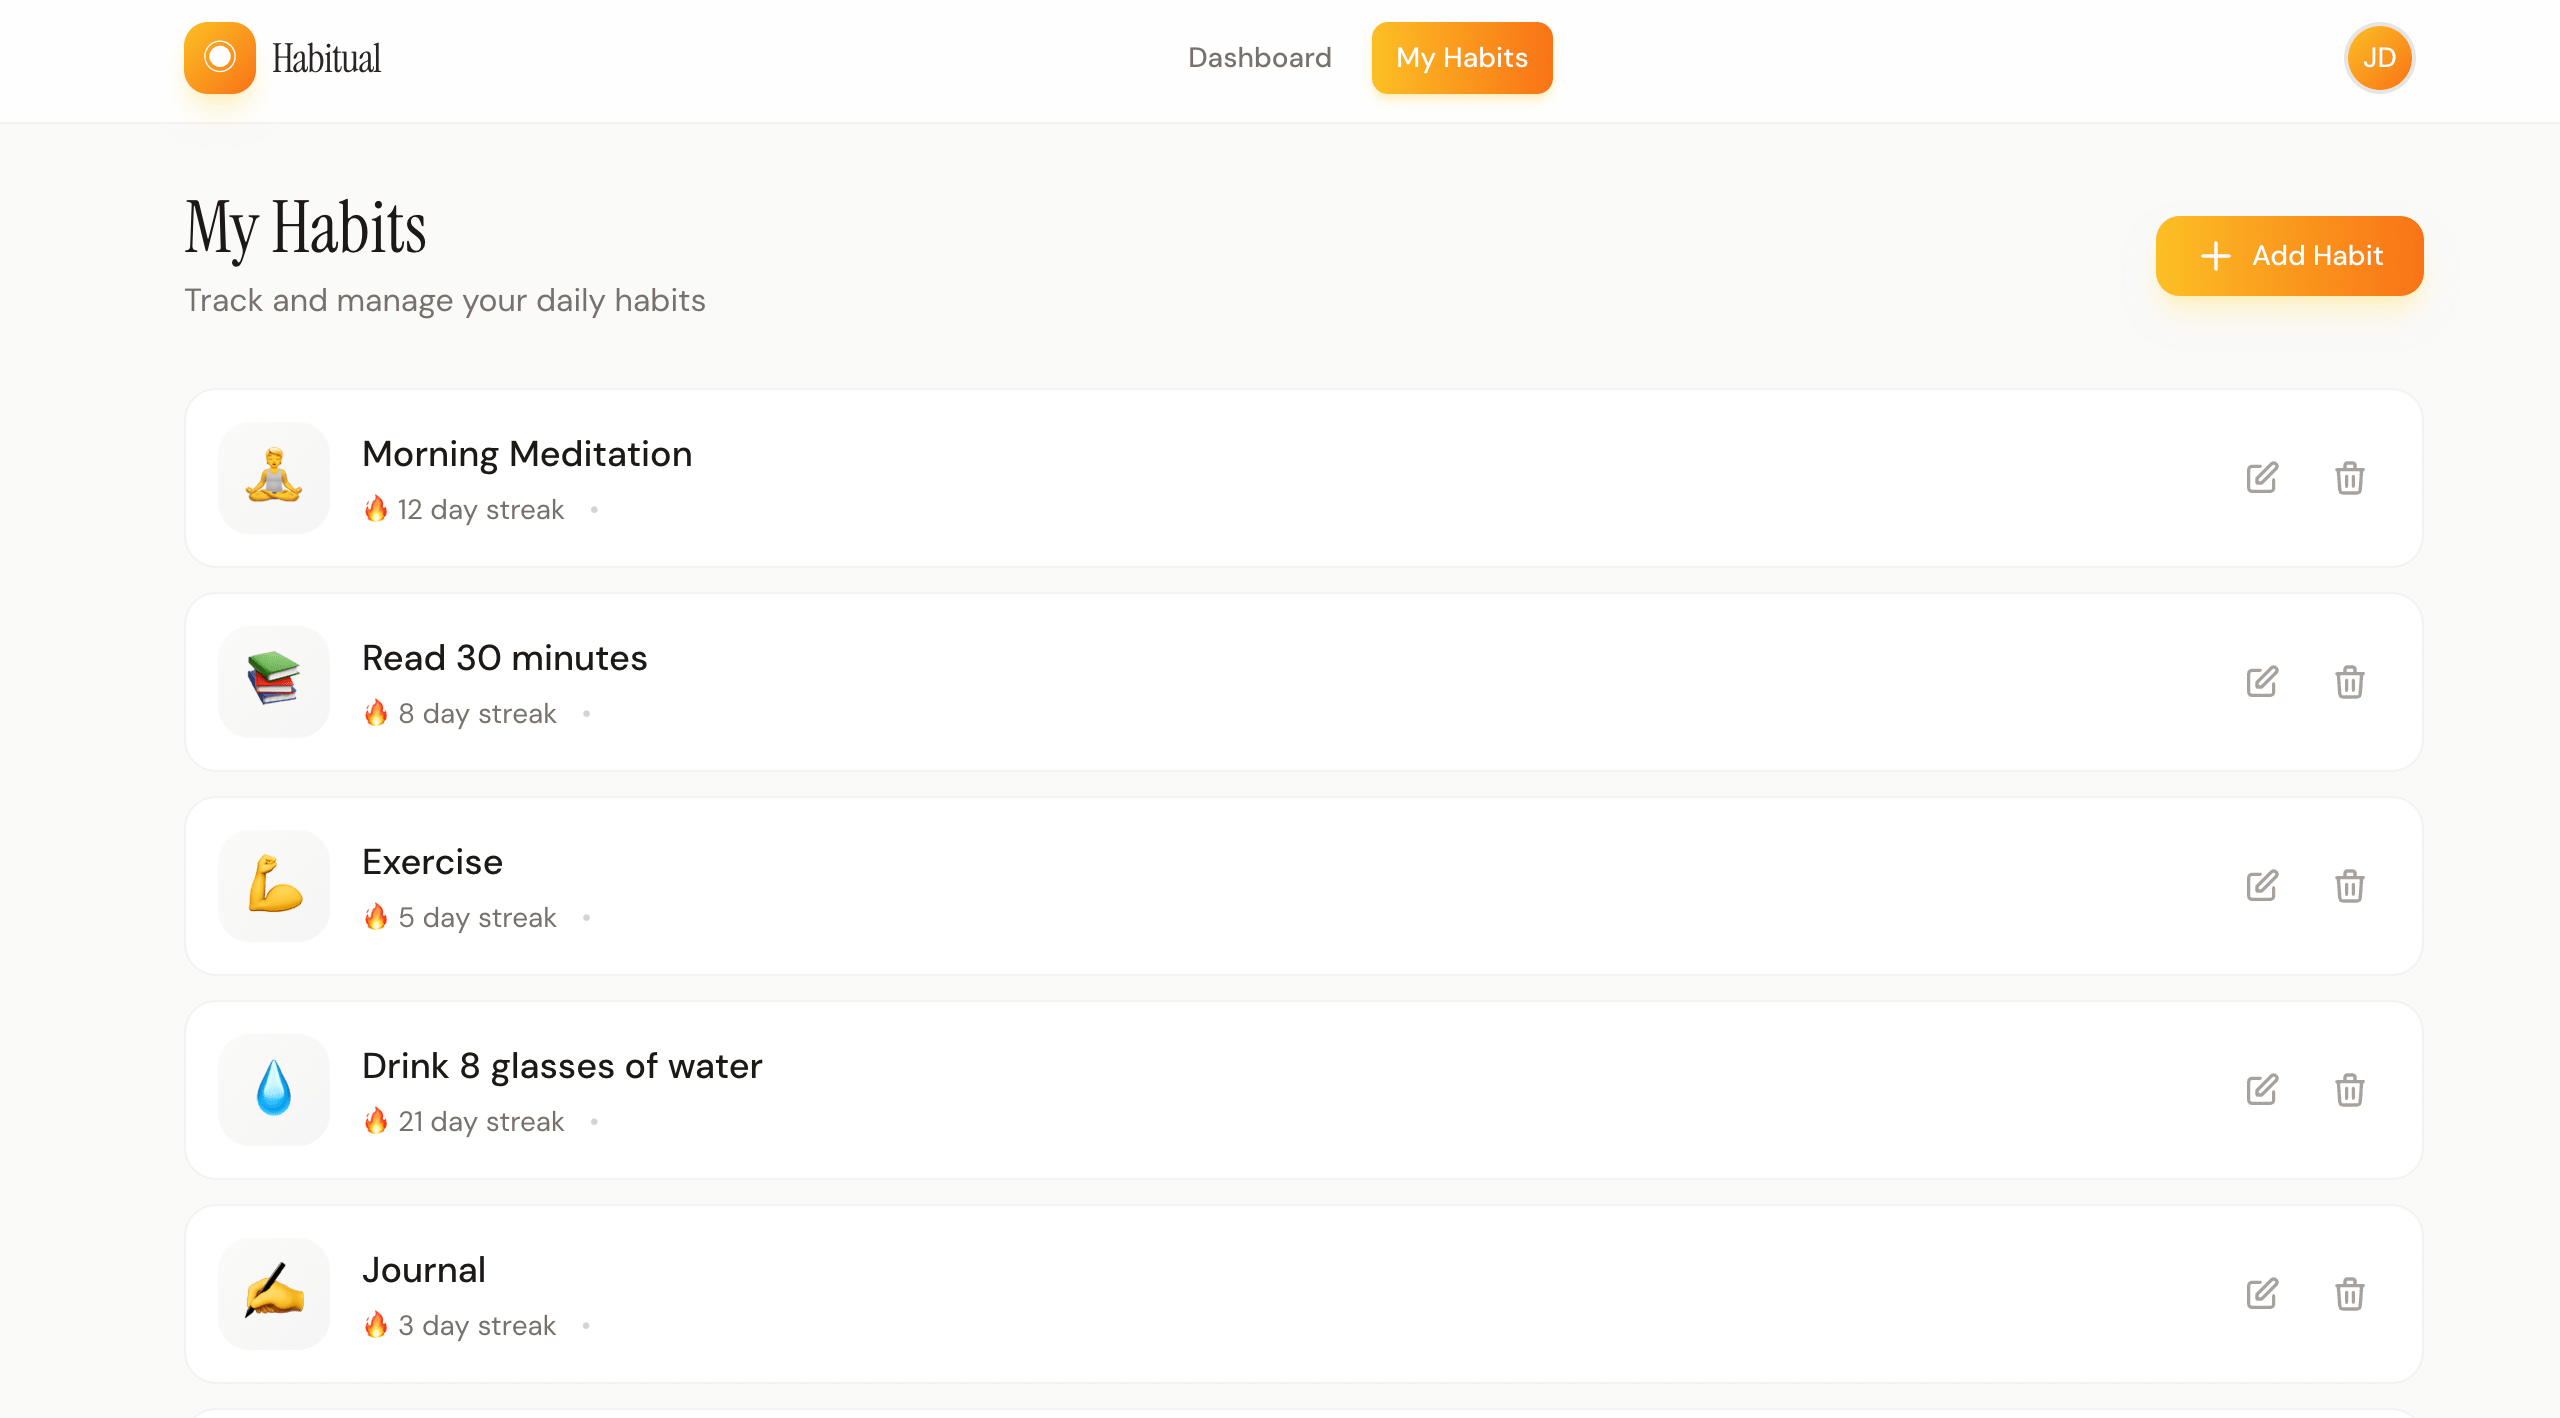
Example: Building Habits CRUD
Let's walk through the cycle with our first real feature—the ability to create, read, update, and delete habits. This is the core of our app.
Step 1: Plan Feature & Data Model
Before writing code, get clear on what you're building. Spend 10-30 minutes thinking through the user experience and data requirements.
Feature scope:
Data model — habits table:
Step 2: Create Migration
Now translate your data model into a database migration. This creates the actual table in your database.
Complete migration SQL
Step 3: Create API Routes
With the database ready, create the API endpoints that your frontend will call. These handle all the business logic and database operations.
Step 4: Implement UI
Now build the user interface. This is where users actually interact with your feature—make it intuitive and responsive.
Step 5: Manual Testing
Before automating anything, click through the feature yourself. Find and fix obvious bugs now—it's faster than debugging failing tests later.
Step 6: Write Tests
Once everything works manually, write tests to lock in the behavior. Tests catch regressions when you add new features later.
Install the testing libraries (you only do this once per project):
Unit tests verify individual pieces work correctly in isolation. They're fast and run without a browser.
Expected output: Test files in tests/ or *.test.ts files next to your API routes. Each test mocks Supabase responses and verifies your route handlers return correct data and status codes.
E2E (end-to-end) tests simulate real users clicking through your app in an actual browser. They're slower but catch integration issues.
Expected output: Test files in e2e/ or tests/ folder. Playwright launches a real browser, navigates to your app, fills forms, clicks buttons, and asserts the UI updates correctly.
Tests as safety nets
Build first, test to lock it in. Tests ensure future changes don't break existing features.
Step 7: Deploy
Feature complete and tested locally? Time to ship it.
Merge to dev (deploys to staging):
Test on your staging URL. Once it works, promote to production:
Merge dev to main (deploys to production):
Always push database migrations BEFORE merging code that depends on them.
Launch & Monitor
You've built features, tested them on staging, and deployed to production. Now it's time to launch properly.
Custom Domain
Connect your own domain to make your app feel professional.
Pre-Launch Checklist
Before announcing to the world, verify these basics:
Monitoring
Once your app is live, you need visibility into errors and user behavior. These tools have free tiers for small apps.
Error tracking — Know when things break before your users tell you:
Analytics — Understand how users interact with your app:
Don't over-engineer monitoring at launch. Start with error tracking (Sentry) so you know when things break. Add analytics once you have users and questions about their behavior.
Advanced Topics
Once you've shipped your MVP and have users, add these features as needed.
Stripe Payment Integration
Real-time Features (Supabase Realtime)
File Uploads (Supabase Storage)
Email Notifications (Resend)
Background Jobs (Scheduled Tasks)
Working Effectively with AI
Be Specific
Give Context
Iterate
Verify
Be Specific
Give Context
Iterate
Verify
AI Strengths vs Your Judgment
AI excels at
You decide
Project Rules Files
Most AI coding tools let you store project context in a rules file. This gives the AI knowledge about your stack, conventions, and patterns—so you don't have to repeat yourself in every prompt.
What to include in your rules file:
Start simple, iterate
Begin with basic stack info and add rules as you notice repeated corrections. A good rules file evolves with your project.
Effective Prompting
The golden rule
Be specific about what you want, include relevant context, and tackle one thing at a time.
What You've Learned
You now understand:
More importantly: You have a repeatable process. Every app follows this pattern.
Next Steps
Pick a project that matches your current skill level and build it end-to-end using this guide.
🌱 Start Simple
🌿 Medium Complexity
🌳 More Advanced
Now go build something real
You know the process. You have the tools. The difference between people who ship and people who don't isn't talent—it's starting, then following through systematically.
Last updated: December 2024
Resources
Table of Contents
相關文章